How to make a dreamcatcher trellis for your garden
I really do not like trellises. There, I said it! I have tried a few different ones over the years and invariably they have either broken down very quickly under the stress of heavy climbers or because of the weather etc. I know, I probably did not invest enough money to get heavier duty ones but, I really did not come across any that suited my garden. This was back in England, where I had a small garden and I really couldn’t fit something too cumbersome (which are always sturdier and probably more beautiful too). Anyway, I digress. Fast forward to last year, when I really wanted to cover some walls with some greenery and even in Italy, I couldn’t find anything that suited my style so, as I was enjoying making dreamcatchers with my son, I had a brilliant idea (or so I think) to make a giant dreamcatcher on the wall in place of the usual lattices/trellises that you find at garden centres.
So I will outline below how to make a dreamcatcher trellis if you wish to make one yourself. It is actually quite easy and I would even suggest: therapeutic! First though, I would recommend to get familiar with making the small version of the dreamcatcher, so that you get used to the mechanics of it. My son and I spent some time making them just for fun. We didn’t always use the hoops you buy in stores, most of the times we just used twigs from the garden closed in a loop and that was good enough for us. Here below, you can see my son working on one for his “girlfriend” back then.
You can find many tutorials online, or you can follow mine here. Once you are familiar with them, you are ready to go.
The materials you will need are the following:
- rope/twine (according to how big you want to make it, and how thick the rope you choose. I used a thin 4mm rope, and for my dreamcatcher which has a 2m diameter I used 30m).
- screwdriver/hammer/drill (depending on the surface you want to attach the dreamcatcher to)
- screws/nails (as above)
A note on choosing the materials: For the rope, even though I always avoid plastics both in my garden and at home, I would suggest using a synthetic one as I initially used a natural twine and it broke off after a few weeks, so I had to resort to a nylon one which, so far, has lasted for the past couple of years. As per nails/screws etc it obviously depends on where you want the dreamcatcher. If you want it on a brick wall, you will have to drill some holes and then use screws or hook screws etc, while on a wooden fence, nails and a hammer would work perfectly fine.
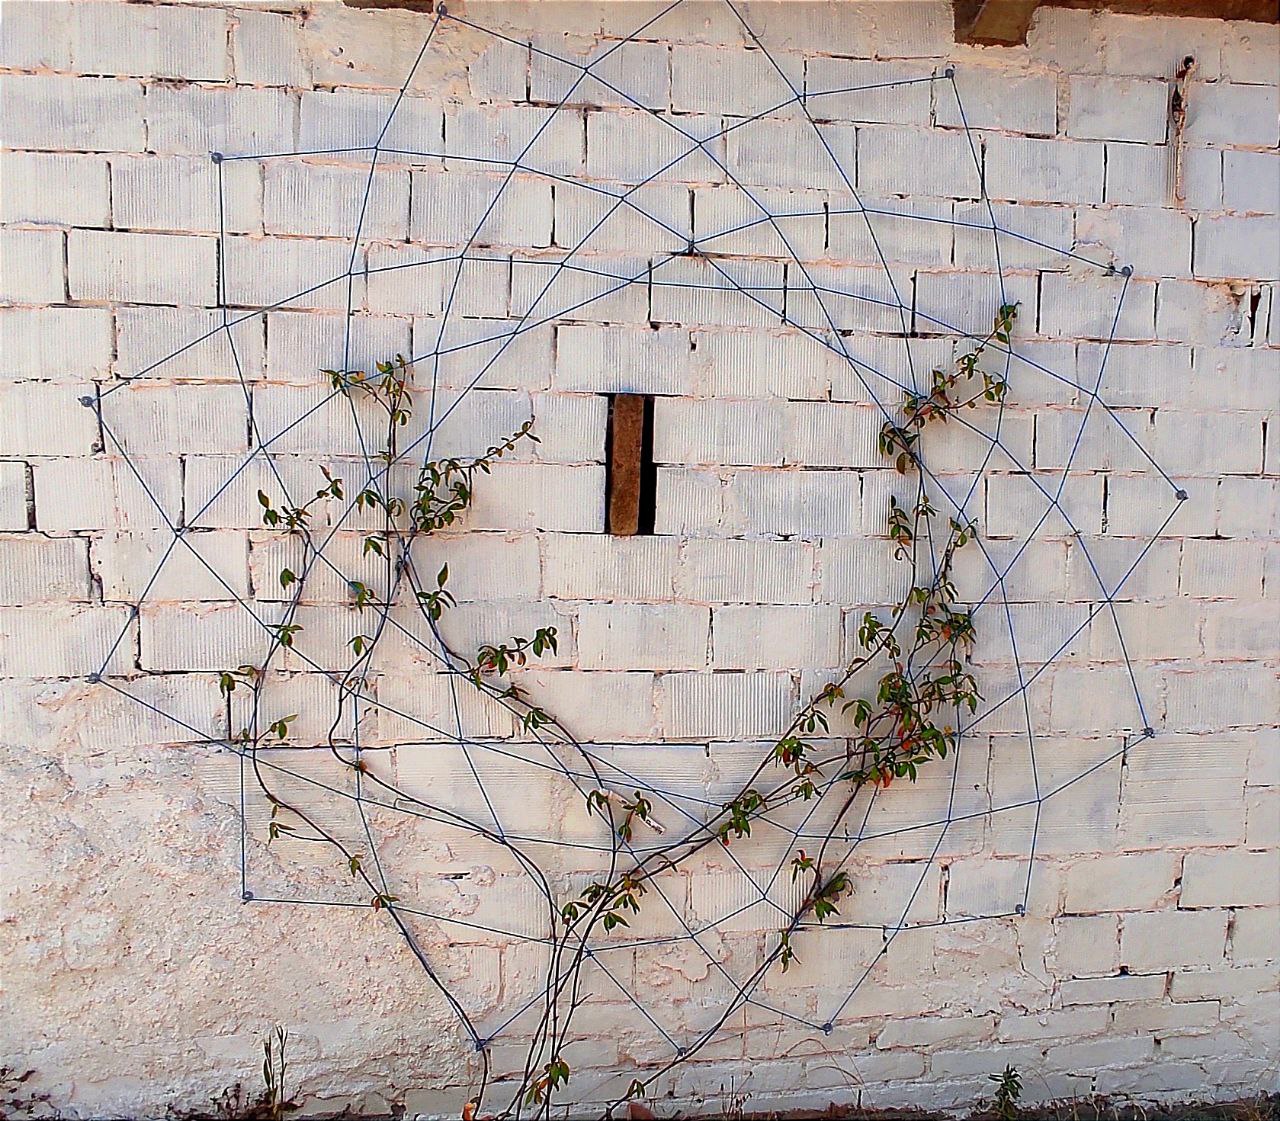
First of all, draw a circle on your chosen wall with a chalk or something similarly easy to wash off, then decide on the number of screws or nails you are going to use. I used 13 screws hooks for mine which has a diameter of 2 metres. The more you use, the more elaborate the lattice will be (this is also why it is a good idea to practice a few times before, so that you can see what you like best). Once decided on the number, it is time to evenly drill/nail them in, using the previously drawn circle as a guide.
Now you can start by knotting your rope to the first one and go around the whole circle, wrapping the rope around every screw, once. And then, if you have had a few practice runs, you will be able to follow the usual pattern for the dreamcatcher and that is it!
You can see a little video below of when I made my second one.
I hope you enjoyed this tutorial and if you make your own dreamcatcher trellis or just use it as art in the garden, please tag me on Instagram or Facebook as I would really love to see them.
Gaby xx


-
-
8 months
Tagged building a pond, diy, fish, fish pond, garden